How to Take a Screenshot on a Samsung Phone or Tablet

Capturing screenshots is a convenient way to share information, images, and error messages with your friends or technical support teams. It is a useful feature that is available in all Samsung devices, including tablets and smartphones. A screenshot basically captures an image of your screen and saves it as a file that you can share or edit later.
If you own a Samsung device and want to learn how to take a screenshot, you have landed on the right page. Here are the steps you need to follow to take screenshots on Samsung phones or tablets.
Using Physical Buttons
One of the easiest ways to take a screenshot on a Samsung phone or tablet is by using physical buttons. The steps are as follows:
Step 1: Open the screen or app you wish to capture.
Step 2: Press and hold the Power button and the Volume Down button (or home button in some older devices) simultaneously.
Step 3: Hold the buttons until you see a brief animation or hear a shutter sound.
Step 4: The screenshot will be saved in your Gallery or Screenshots folder.
Using Palm Gesture
Another convenient way to take a screenshot on a Samsung device is by using a palm gesture. This feature is available on devices running Android 9.0 or newer versions with One UI 2.0 or higher. Here are the steps you need to follow:
Step 1: Open the screen you want to capture.
Step 2: Place your hand on the side of the screen, like a karate chop.
Step 3: Swipe your hand across the screen from left to right or right to left.
Step 4: You will hear a shutter sound and see a brief animation.
Step 5: The screenshot will be saved in your Gallery or Screenshots folder.
Using Bixby Voice Assistant
If you have a Samsung device with Bixby Voice Assistant, you can also use it to take screenshots. Here’s how:
Step 1: Wake up your device by saying, “Hi, Bixby.”
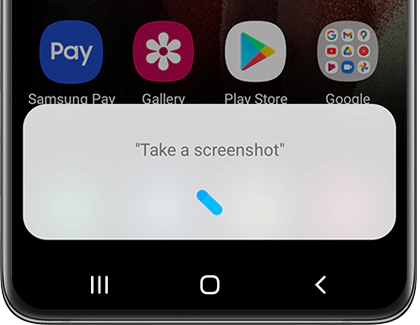
Step 2: Say, “Take a screenshot.”
Step 3: Bixby will capture the screenshot, and you will see a preview on the screen.
Step 4: You can choose to save, edit and share the screenshot.


