How to Sync a Wii Remote

Syncing a Wii remote is an important step towards an excellent gaming experience. Whether you have lost the connection, purchased new remotes, or swapped out batteries, syncing your Wii remote is relatively simple.
Before diving into the steps, ensure that your Wii console is powered on, and that no other devices are connected.
Follow these steps to sync your Wii remote:
Step 1: Open the SD card slot
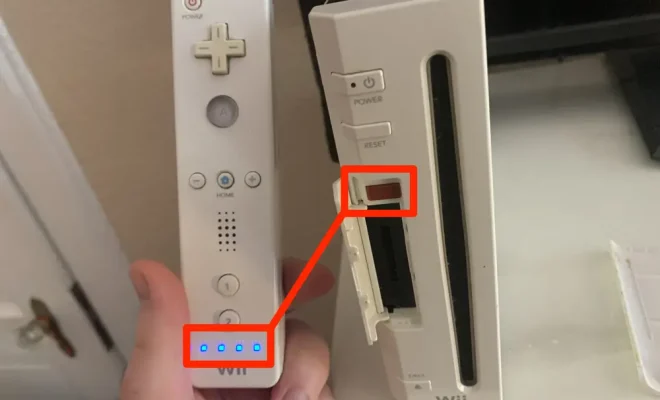
First, make sure that the Wii console is powered on. Locate the SD card slot on the front of the console and open it.
Step 2: Turn on the Wii remote
Press the power button on the Wii remote. The blue lights on the bottom of the remote should start flashing.
Step 3: Locate the Red Sync Button
On your Wii console, press and hold the red sync button located on the front of the console. Do not release it until step 4 is complete.
Step 4: Press the Sync Button on the Wii Remote
Press and hold the sync button located at the bottom of the Wii remote, near the batteries. The blue lights on the bottom of the remote will stop flashing, indicating that the remote is synced with the console.
Step 5: Wait for the Sync to Complete
Wait a few seconds for the connection to complete. Once it does, the blue lights on the bottom of the remote will stop flashing and become a solid light.
Step 6: Repeat Steps for Additional Remotes
If you have other Wii remotes to sync, you will need to repeat the steps for each remote.
If your Wii remote is still not syncing, you may need to troubleshoot possible causes. Ensure that the batteries are properly inserted or replace them. Try resetting the remote, or try syncing the remote with a different Wii console.
In conclusion, syncing a Wii remote is an easy process once you know the steps. Remember to make sure your console is on and follow the steps precisely, and you will be able to enjoy your Wii games without interruption.


