How to Stamp Leather: 10 Steps
Introduction:
Stamping leather is an engaging and rewarding craft that allows you to stylishly customize your leather pieces. With a wide range of patterns and designs, the possibilities are endless. In this article, we will guide you through the 10 steps on how to achieve that perfect leather stamp look.
Step 1: Gather Your Tools and Materials
The tools you’ll need for leather stamping include a stamping toolset, leathercraft hammer or mallet, swivel knife, and the leather piece to be stamped. Also, have a clean workspace ready to keep your materials organized.
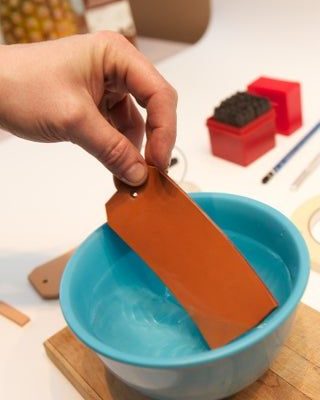
Step 2: Wet the Leather
You’ll start by wetting the leather with water. Wetting helps soften the material so it can more easily receive impressions from your stamping tool. Dampen your sponge or spray bottle with water and gently wipe it across the surface of the leather.
Step 3: Sketch Your Design
Before stamping, consider sketching your design onto paper. After drawing the concept, you can transfer it onto the leather piece using a pencil or stylus.
Step 4: Prepare Your Swivel Knife
Properly preparing your swivel knife will lead to better cuts on your leather surface. Sharpen and polish its blade so it easily glides over your material while cutting.
Step 5: Carving Your Design
Carefully start carving your design into the dampened leather by following your drawn lines with the swivel knife. Hold the knife upright and avoid applying too much pressure; delicate cuts work best.
Step 6: Select Your Stamping Tools
Choose from a variety of stamping tools such as backgrounders, bevellers, camouflage stamps, and more based on your desired outcome.
Step 7: Tap with a Hammer or Mallet
Hold the stamping tool in place over one portion of your design and tap it with the hammer or mallet. Each tap should be of medium force to ensure a deep and even impression in the leather.
Step 8: Work Your Way Around the Design
Repeat this process, working your way around the entire design. Start from one section, and move to the next in a consistent manner to achieve an even pattern.
Step 9: Experiment with Stamping Patterns and Techniques
Try out individual stamps to create unique patterns, or try combining various stamping tools to create intricate designs. Mastering different techniques will help you improve your leather-stamping skills.
Step 10: Let the Leather Dry
Once your stamping is complete, allow your leather piece to dry completely before using it. This will help preserve your design and enhance the appearance of your leather.
Conclusion:
Leather stamping is a fun and creative way to personalize your leather items. With patience and practice, you can create beautiful designs for yourself or others. Get started now by following these ten simple steps in your journey towards creating unique, hand-stamped leather masterpieces.