How to Set Up Bluetooth Audio on a Nintendo Switch — and Why it’s Worth Doing

Introduction
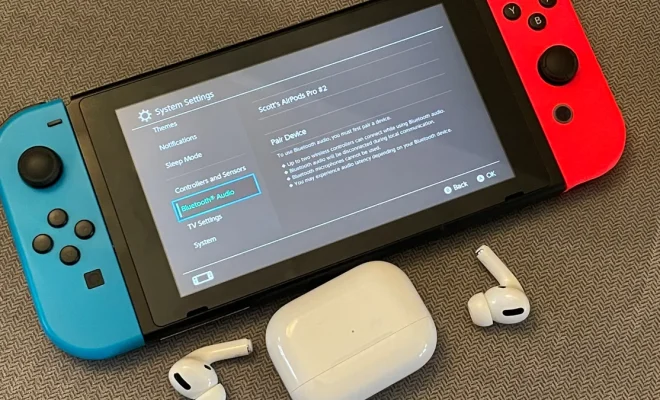
The Nintendo Switch has been an innovative game changer in the world of home entertainment, but one feature that seems to be lacking is Bluetooth audio support. Many users may not realize just how easy this can be resolved, or the benefits it can bring. In this article, we’ll go through the process of setting up Bluetooth audio on your Nintendo Switch, and why it’s worth taking the time to do so.
Why Bluetooth Audio is Worth It
1. No Wires: Wires can be quite limiting, especially when playing on-the-go or moving around. By switching to Bluetooth audio, you’ll enjoy a truly wireless gaming experience without sacrificing sound quality.
2. More Speaker Options: When connecting your Nintendo Switch to your TV, you’re limited to the built-in speakers or a wired connection. With Bluetooth audio enabled, you’ll have access to a wider variety of speaker options including soundbars, surround sound systems, and portable speakers.
3. Multi-player Sessions: A major benefit with Bluetooth audio connectivity is volume control for each person. Each player can connect their own wireless headset and regulate their own volume levels during multi-player sessions.
4. Improved Battery Life: Wired headphones generally draw more power from your device when compared with connecting over Bluetooth. By using Bluetooth audio devices, you can potentially extend the battery life of your Nintendo Switch during long gaming sessions.
Setting Up Bluetooth Audio on Your Nintendo Switch
To set up Bluetooth audio on your Nintendo Switch, you will need a compatible Bluetooth audio transmitter designed for the console. Follow these steps for an easy setup:
Step 1: Purchase a Bluetooth Audio Transmitter
There are numerous reliable options available online specifically made for the Nintendo Switch. Look for features like low latency support and compatibility with most Bluetooth headphone brands.
Step 2: Attach the Transmitter
Connect the transmitter’s USB-C or USB-A connector (depending on the model) to the bottom of the Nintendo Switch or to the USB port on the dock. Make sure it is securely attached.
Step 3: Pair Your Bluetooth Audio Device
Turn on your Bluetooth headphones, speaker, or earbuds, and place them in pairing mode. Then, press and hold the pairing button on your Bluetooth transmitter until it enters pairing mode. The LED indicator will usually blink to indicate that it is searching for a device. Your headphones or speakers should automatically connect after a few moments.
Step 4: Verify Audio Output
Once connected, check if the audio is now playing through your Bluetooth device. You may need to adjust your Nintendo Switch’s audio settings by navigating to “System Settings” > “TV Settings” > “TV Sound”.
Conclusion
Enabling Bluetooth audio on your Nintendo Switch can greatly enhance your gaming experience by providing wire-free convenience and better sound options. With this simple setup guide, you’ll be ready to enjoy all the benefits that come with wireless audio on one of the most popular gaming consoles in no time.


