How to See Where You’ve Been With the Google Maps Timeline

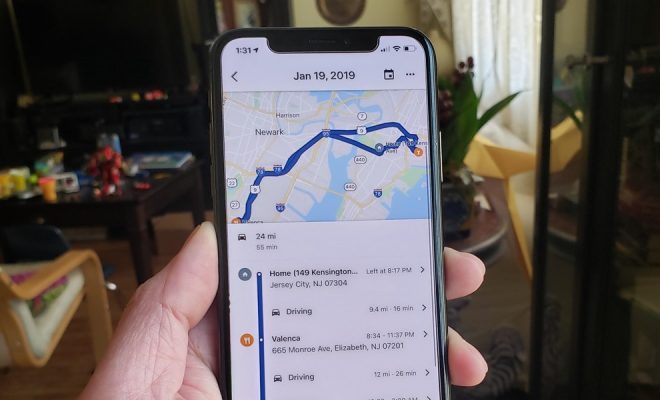
Have you ever wondered where you were last week or even last year? Google Maps Timeline provides an easy and convenient way to see your past locations and activity on a specific date or range of dates. Here’s how to access and use the feature.
1. Enable Location History
Before you can see your timeline, you need to enable Location History in your Google Account settings. If you haven’t already, go to your Account settings and turn on Location History. This will allow Google to store and track your location data.
2. Access Your Timeline
Once Location History is turned on, you can access your timeline by opening Google Maps on your phone or computer, clicking on the Menu icon (three lines), and selecting “Your Timeline.” You can also access your timeline by typing “Google Maps Timeline” into your browser and signing into your Google account.
3. View Your Timeline
Once you’re on your timeline page, you can adjust the date range using the calendar on the left-hand side of the screen. You can also view your timeline by day, week, month, or year by clicking on the drop-down menu at the top of the page. Your timeline will show your activity and locations during the selected time period.
4. Edit and Delete Your Timeline
If you notice any inaccuracies or want to delete your location history, you can edit or delete specific locations by clicking on the location pin and selecting “Edit” or “Delete.” You can also delete your entire location history by clicking on the “Delete all location history” button at the bottom of the page.
5. Use Your Timeline
Your timeline can be helpful in many ways. For example, if you’re trying to remember the name or location of a restaurant you visited or find a specific location you went to on a certain date, you can easily search for it on your timeline. Your timeline can also be useful for budgeting purposes or tracking your exercise habits.


