How to Schedule an Email in Gmail

Gmail, the free email service provided by Google, is one of the most popular email services in the world. One of its many useful features is the ability to schedule an email to be sent at a later time. This feature can come in handy for a variety of reasons, such as sending a message to someone in a different time zone or scheduling a reminder for yourself. Here’s how to schedule an email in Gmail:
Step 1: Compose your email
First, you need to compose your email as you normally would. Enter the recipient’s email address, write your message, and add any attachments you’d like to include.
Step 2: Click the arrow next to the “Send” button
Once you’ve finished composing your email, rather than clicking the “Send” button, click the arrow next to it. This will open a drop-down menu with several options.
Step 3: Choose a date and time to send your email
In the drop-down menu, select “Schedule send.” This will bring up a new window where you can choose a date and time to send your email.
Step 4: Select a date and time
Using the calendar and clock icons, choose the date and time that you’d like your email to be sent. You can schedule your email to be sent up to 14 days in advance.
Step 5: Click “Schedule send”
Once you’ve selected the desired date and time, click “Schedule send.” Your email will now be scheduled to be sent at the selected time.
Step 6: Check your scheduled emails
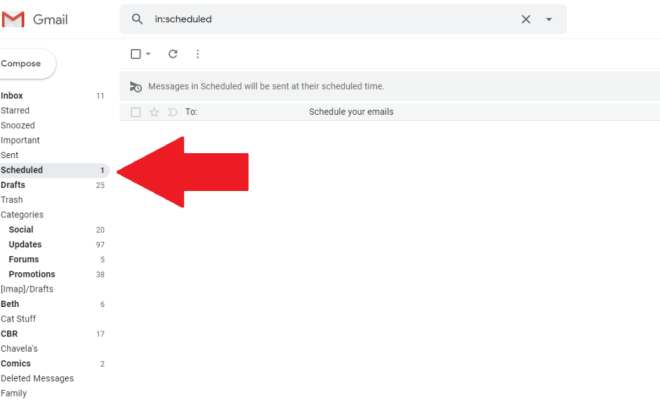
If you want to check on your scheduled emails, go to the “Scheduled” section in Gmail. To do this, click the three lines in the upper left-hand corner of your Gmail inbox, then click “Scheduled.” This will show you a list of all emails you have scheduled to be sent.
In conclusion, scheduling an email in Gmail is a useful feature that allows you to send emails at a later date and time. Using the above steps, you can easily schedule an email in Gmail and have it sent automatically when you want it to be sent.


