How to Reseat Internal Data and Power Cables

When it comes to dealing with computer issues, one of the most common solutions is to reseat internal data and power cables. While it may sound intimidating at first, it’s actually a simple process that can be completed in just a few minutes. In this article, we’ll guide you through the steps to reseat internal data and power cables to troubleshoot your computer problems.
Step 1: Shut down your computer
Before you begin, make sure your computer is completely shut down. This means that there is no power running through it, and it’s safe to touch internal components. Turning off your computer also ensures that you don’t accidentally delete any important data or shut down any running programs.
Step 2: Unplug all external peripherals
It’s important to unplug all external peripherals, such as printers, scanners, and USB drives, connected to your computer. This prevents any accidental power surges or electrostatic discharge from damaging your components. If your computer is a laptop, make sure that it’s unplugged from the AC adapter and the battery is removed.
Step 3: Ground yourself
Before handling any internal components, it’s crucial to ground yourself. This means that you need to discharge any static electricity that may be present in your body. Touching any metal surface or using an anti-static wristband can help you ground yourself.
Step 4: Open the computer case
Most computer cases come with screws that you need to remove to open the case. You can find these screws on the back or side panel of the case. Depending on the type of case you have, you may require a screwdriver or a socket wrench to remove the screws.
Step 5: Locate internal data and power cables
Once the computer case is open, you can locate the internal data and power cables. These cables run from the motherboard to the hard drive, optical drive, and other internal components. There are two types of cables, SATA and IDE. The SATA cables are small and usually red or black, while the IDE cables are wide and ribbon-like.
Step 6: Reseat the cables
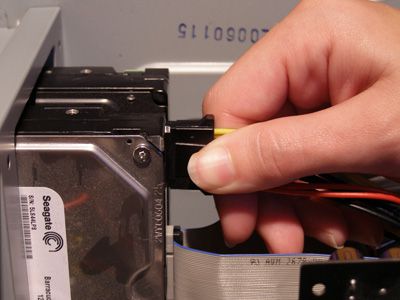
To reseat the cables, you need to gently pull out the cables from the motherboard and the internal components. Make sure you note down the position of the cables, so you can correctly reattach them. Then, insert the cables back into the appropriate ports, ensuring that they’re securely connected. The cables should fit snugly into the ports, and the connectors should be aligned correctly. You can also use a bit of force to push the cables in, but don’t apply too much pressure, as this can damage the components.
Step 7: Close the computer case and turn on the computer
Finally, replace the screws in their respective positions and close the computer case. Then, connect all external peripherals, and turn on your computer. Check if the issues you were facing earlier are still present. If the problem still persists, you can try reseating the cables again or seek professional help.
In conclusion, reseating internal data and power cables is an easy process that can help you troubleshoot various computer problems. By following the above-mentioned steps, you can reattach the cables correctly and ensure that your computer runs smoothly. If you’re unsure about the process, you can refer to the user manual or seek professional help.


