How to Make an Ottoman Cover
Introduction:
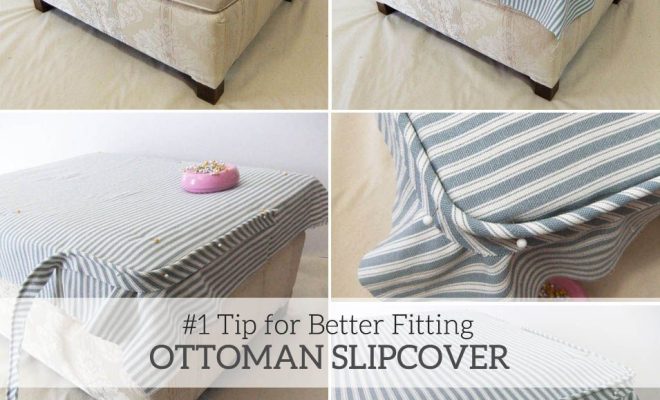
An ottoman cover is a fantastic solution for updating your furniture, adding style to your living room, or simply protecting it from wear and tear. With some basic sewing skills and the right materials, you can create a custom cover for your ottoman in no time. Follow our step-by-step guide to making an ottoman cover and transform your furniture with ease.
Materials You’ll Need:
1. Measuring tape
2. Fabric of your choice (preferably upholstery fabric)
3. Sewing machine
4. Scissors
5. Pins
6. Thread that matches the fabric color
7. Optional: Velcro or zippers for easy removal
Step 1: Measure Your Ottoman
Before you can make a custom cover, you need to know the dimensions of your ottoman. Measure its length, width, and height in inches or centimeters. Be sure to round up any fractions of an inch or centimeter for easier calculations when cutting fabric later.
Step 2: Choose Your Fabric
Select a fabric that matches the design and the color scheme of your room. Upholstery fabric is especially suitable for this project as it is more resistant to wear and tear. Remember that you’ll need extra fabric if you plan to add zippers or Velcro.
Step 3: Calculate Fabric Dimensions
To determine how much fabric you need, follow these steps:
– For the top piece, add 1 inch (2.5 cm) seam allowance to both the length and width measurements.
– For the side piece, add 1 inch (2.5 cm) seam allowance to both the height and total perimeter measurements [(Length + Width) x 2].
Step 4: Cut Your Fabric Pieces
Carefully cut out two rectangular pieces from the fabric based on the calculations from Step 3 – one piece for the top part of the ottoman and one for the side skirt.
Step 5: Pin and Sew the Side Piece
Fold the side piece in half lengthwise, with the right sides facing each other, and align the edges. Pin along the two shorter sides, leaving an opening if you’re adding a zipper or Velcro. Sew the pinned edges with a 1/2-inch (1.25 cm) seam allowance. Press seams flat.
Step 6: Attach the Top Piece to the Side Piece
Lay your top fabric piece right side up on your work surface. Align the sewn side piece (right side down) along the perimeter of the top piece, pinning it as you go. Be sure to align any corners carefully. Sew around the perimeter using a 1/2-inch (1.25 cm) seam allowance.
Step 7: Hem the Cover’s Bottom Edge
Fold under 1/2 inch (1.25 cm) of fabric around the entire bottom edge of your cover and press with an iron to create a clean hemline. Sew along this folded edge to help it lay flat and give your cover a finished look.
Step 8 [Optional]: Adding Velcro or Zippers
If you opted for easy removal, sew Velcro or zippers onto your opening accordingly. Make sure zippers have fabric stops at each end to prevent damages during use.
Conclusion
With these simple steps, you’ve created a custom, stylish ottoman cover that gives new life to your furniture. Slip on your new cover and enjoy your updated living space! Remember that you can easily change out covers if you want to switch up the vibe in your room or protect your ottoman during different seasons.