How to Grow Wheat in Your Garden
Introduction
Growing your own wheat may seem like a daunting task, but it’s actually quite simple and rewarding. Not only can you save money by producing your own flour, but you’ll also know exactly where your food comes from and how it’s grown. In this article, we will teach you how to grow wheat in your garden successfully, step by step.
1. Select the Right Variety of Wheat
There are several types of wheat to choose from: hard red winter wheat, hard red spring wheat, soft white winter wheat, and soft white spring wheat. Hard red varieties are suitable for making bread, while soft white varieties are better suited for pastries and other baked goods. Winter wheats are planted in the fall and harvested in early summer, while spring wheats are planted in the spring and harvested in late summer or early fall.
Choose the type of wheat that best suits your needs and climate. Consult with local farmers or gardening stores for advice on which varieties will thrive in your region.
2. Choose a Suitable Planting Site
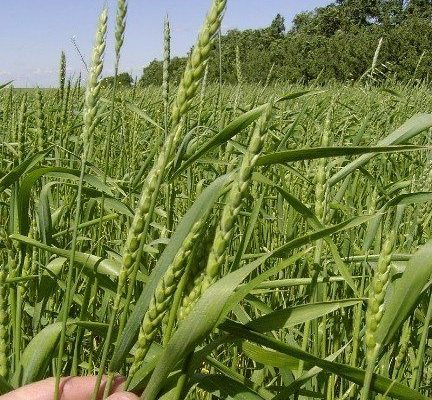
Wheat requires full sun and well-draining soil with a pH between 6.0 and 7.0. You’ll want to select a site that receives at least 6-8 hours of sunlight per day and has good air circulation to help prevent fungal diseases.
Test your soil pH using a home testing kit or send a sample to a professional lab for analysis. Amend the soil as necessary with lime (to raise pH) or sulfur (to lower pH) to create an optimal growing environment.
3. Plant the Seeds
Wheat can be sown directly into the ground using a hoe or garden rake to create planting furrows approximately 1 inch deep and 4 inches apart. Broadcast the seeds evenly across each row at a rate of about one seed per inch, then gently cover them with soil.
Water the newly planted seeds thoroughly, but avoid overwatering to prevent seed rot. Keep the soil consistently moist until the wheat germinates, which typically takes 7-10 days.
4. Fertilize and Protect Your Wheat
To promote healthy growth, apply a balanced fertilizer to your wheat approximately 3-4 weeks after germination, following the manufacturer’s recommendations on rates and application methods.
Keep an eye out for pests such as aphids, which can damage your wheat crop. Insecticidal soap or neem oil can help control these pests. Birds can also be a problem, so consider using reflective surfaces or netting to keep them away from your wheat plants.
5. Harvesting and Processing Your Wheat
Your wheat is ready to harvest when the stalks begin to turn golden brown and the heads droop slightly. Use a sharp scythe or sickle to cut the stalks close to the ground, then bundle them together in sheaves and allow them to dry for a few weeks in a well-ventilated area.
Once dry, thresh your wheat by laying sheets or tarps on the ground and beating the bundles against them to release the grains from their husks. Winnow your wheat by tossing it into the air (preferably outdoors) and allowing the lighter chaff to blow away, leaving behind clean grains.
Store your harvested wheat in a cool, dry place until you’re ready to grind it into flour or use it as seed for next year’s crop.
Conclusion
Growing wheat in your garden can be a rewarding experience that allows you to connect with nature and enjoy fresh, healthy, homegrown food. Follow these simple steps for successful wheat cultivation and join the ranks of gardeners who take pride in producing their own grains.