How to Fix Mfc110u.dll Not Found or Missing Errors

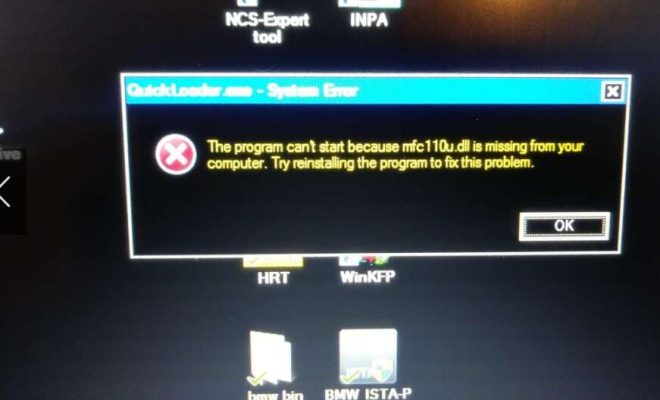
Mfc110u.dll is an important system file that is required for many Microsoft Visual Studio applications to function properly. However, sometimes users may encounter a “mfc110u.dll not found or missing” error message while running such applications. This error can occur due to various reasons, such as corrupt or outdated software, malware infections, registry issues, or faulty hardware. If you are facing this error, don’t worry, as we will guide you through the steps to fix it.
Here are some effective solutions that can help you fix the mfc110u.dll not found or missing errors:
1. Reinstall the Application:
The first step to fix this error is to reinstall the application that is giving the error. This is because sometimes the application is not properly installed, or the files are corrupted. To reinstall the application, follow these steps:
– Go to the Control Panel and navigate to the Programs section.
– Find the application that is giving the error and click on it.
– Click on the “Uninstall” button and follow the on-screen instructions to remove the application.
– Once you have uninstalled the application, restart your computer.
– Download and install the latest version of the application from the official website.
– Once the installation process is complete, restart your computer and check if the error is fixed.
2. Update Your System:
If your system is not up to date, it can cause many errors, including the mfc110u.dll not found or missing error. Therefore, it is recommended to update your system to the latest version. To do that, follow these steps:
– Go to the “Settings” app on Windows.
– Click on the “Update & Security” option.
– Click on the “Check for updates” button.
– If there are any updates available, download and install them.
– Once the updates are installed, restart your computer and check if the error is fixed.
3. Run a Virus Scan:
Sometimes, malware infections can cause the mfc110u.dll not found or missing error. Therefore, it is recommended to run a full system virus scan to detect and remove any malicious files. To run a virus scan, follow these steps:
– Open your Antivirus or Windows Defender Security Center.
– Click on the “Virus & threat protection” option.
– Click on the “Scan options” link.
– Select the “Full scan” option and click on the “Scan now” button.
– Wait for the scan to complete and remove any detected malware.
– Restart your computer and check if the error is fixed.
4. Reinstall Microsoft Visual C++ Redistributable:
If none of the above solutions work, try reinstalling the Microsoft Visual C++ Redistributable package. To do that, follow these steps:
– Go to the Microsoft Download Center.
– Download the latest version of the Microsoft Visual C++ Redistributable package.
– Once the download is complete, run the setup file and follow the on-screen instructions to install the package.
– Restart your computer and check if the error is fixed.
5. Manually Register the DLL file:
If the mfc110u.dll file is not registered correctly, it can cause the error. Therefore, you can try manually registering the DLL file by following these steps:
– Open the Command Prompt with admin rights.
– Type the following command: regsvr32 C:\WINDOWS\system32\Mfc110u.dll
– Press the Enter key to execute the command.
– Once the process is complete, restart your computer and check if the error is fixed.
Conclusion:
By following the above solutions, you can easily fix the mfc110u.dll not found or missing errors. If the error still persists after trying all the solutions, it may be due to a hardware issue, and you may need to contact a professional technician.


