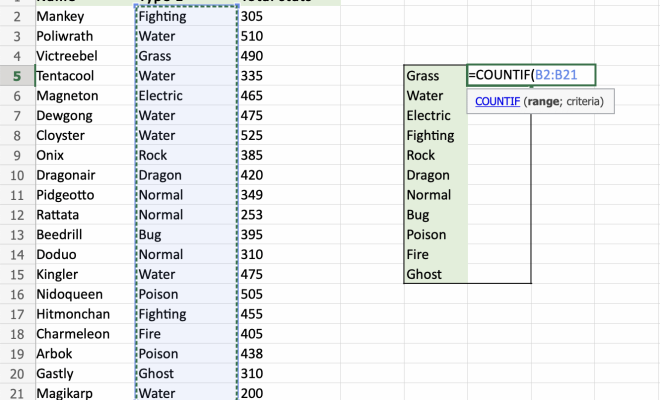
How to Count Data in Selected Cells With Excel’s COUNTIF Function

Excel’s COUNTIF function is a powerful tool to count data in selected cells. It enables you to count the number of cells that meet a certain criteria, such as a specific text, number, or date. In this article, we’ll explore how to use the COUNTIF function to count data in selected cells.
Step 1: Select the range of cells you want to count
First, you need to select the range of cells that you want to count. This can be a single cell, a row, a column, or a range of cells.
Step 2: Open the formula bar
Next, you need to open the formula bar. You can do this by clicking on the formula bar in the top of the Excel window or by using the keyboard shortcut “Ctrl + F2”.
Step 3: Type the COUNTIF formula
In the formula bar, you should type the COUNTIF formula. The basic syntax of the COUNTIF formula is:
=COUNTIF(range, criteria)
The “range” argument specifies the range of cells you want to count, while the “criteria” argument specifies the condition that the cells must meet to be counted.
For example, if you want to count the number of cells in the range A1:A10 that contain the text “apple”, you should type:
=COUNTIF(A1:A10, “apple”)
Step 4: Press Enter to display the result
After you have typed the formula, you need to press Enter to display the result. The result will be the number of cells in the selected range that meet the specified criteria.
You can also use other operators in the criteria argument, such as “<“, “>”, “<=”, “>=”, “<>”, and “*”. For example, if you want to count the number of cells in the range A1:A10 that contain a number greater than 5, you should type:
=COUNTIF(A1:A10, “>5”)
In conclusion, Excel’s COUNTIF function is a powerful tool to count data in selected cells. It enables you to count the number of cells that meet a certain criteria, such as a specific text, number, or date. By following these simple steps, you can easily use the COUNTIF function to count data in Excel.


