How to Change a Word Document to Print Different Paper Size

Changing the paper size for printing a Word document can be a tricky task for many, but it is not impossible. With just a few simple steps, you can easily adjust the print settings and print your document on any paper size you want. Here’s how you can do it:
Step 1: Open the document you want to print in Microsoft Word.
Step 2: Click on the “File” tab in the top left corner of the screen.
Step 3: Select “Print” from the drop-down menu.
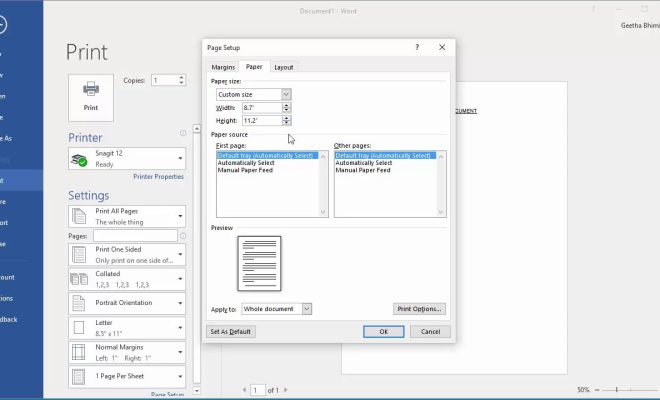
Step 4: In the Print menu, click on the “Page Setup” button located at the bottom of the page. This will bring up the Page Setup dialog box.
Step 5: In the Page Setup dialog box, click on the “Paper” tab.
Step 6: Under the “Paper size” section, select the paper size you want to print on from the drop-down menu.
Step 7: Once you have selected the appropriate paper size, click on “OK” to close the dialog box.
Step 8: Now, return to the Print menu and select the printer you want to use.
Step 9: Click on “Print” to print your document on the newly selected paper size.
By following these simple steps, you can quickly change the paper size for printing your Word document. It is important to note that not all printers support all paper sizes, so make sure to check your printer’s manual before selecting a paper size. Also, be sure to adjust any margins, font sizes, or other formatting options as needed to ensure that your document looks correct on the new paper size.
In conclusion, changing the paper size for your Word document is a straightforward process that can be achieved with just a few clicks. With this knowledge, you can easily print on any paper size you need, whether it be letter, legal, or something else entirely. So, go ahead, give it a try and see how easy it can be to change your paper size in Word!


