How to Change a Computer Name in Windows

Changing a computer name in Windows is a simple process that can be done in just a few easy steps. By changing the name of your computer, you will be able to give it a unique identity and make it easier to identify on a network. In this article, we will guide you through the steps to change the name of your computer.
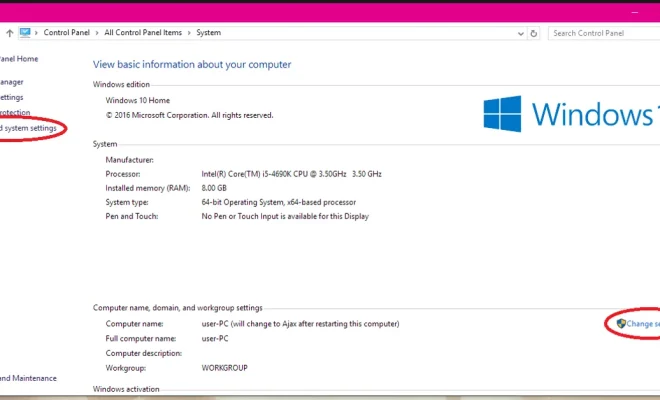
Step 1: Right-click on the “Start” button and select “System”.
Step 2: Click on “Advanced system settings” on the left-hand side of the screen.
Step 3: Select the “Computer Name” tab at the top of the window.
Step 4: Click on the “Change” button.
Step 5: Type in the new name you want to give your computer in the “Computer name” field.
Step 6: Click on the “OK” button.
Step 7: A pop-up will appear asking you to restart your computer. Click on “OK” to confirm and restart your computer.
Step 8: After your computer has restarted, the new name should be reflected in the system properties window.
By following these simple steps, you can easily change the name of your computer in Windows. It is important to note that changing the name of your computer will not affect any of your files or programs. Changing the name will also not affect the operation of your computer in any way, so there is nothing to worry about.
Overall, changing the name of your computer can help you to make your computer unique and more easily identifiable on a network. So, follow these steps to give your computer a new identity and enjoy using it!


