How to Auto-Disable the Touchpad When Connecting a Mouse on Windows 10

If you have a laptop or tablet with a touchpad, you may find it frustrating when you accidentally brush your hand against it while typing or using an external mouse. Fortunately, Windows 10 offers a simple solution: automatic touchpad deactivation when you connect a mouse. In this article, we’ll guide you through the steps to set up this feature.
Step 1: Open Mouse Settings
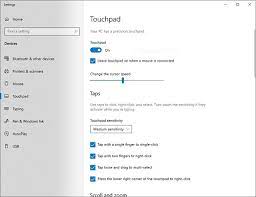
Go to the Start menu and search for “Settings.” Click on it to open the Settings app. Navigate to the Devices category and click on “Mouse.” This will take you to the Mouse settings page.
Step 2: Choose Additional Mouse Options
On the right-hand side of the page, you will see a link for “Additional mouse options.” Click on it to open the Mouse Properties window.
Step 3: Disable Touchpad When a Mouse is Connected
In the Mouse Properties window, click on the “Device Settings” tab. You should see an option called “Disable internal pointing device when external USB pointing device is attached.” Check the box next to this option and click “Apply” and “OK.”
Step 4: Test It Out
Now it’s time to test if the touchpad deactivation works. Plug in your external mouse and start using it. If the feature is working properly, the touchpad should automatically be deactivated, and you won’t be able to move the pointer using it. When you unplug the mouse, the touchpad should become active again.
Final Thoughts
By following these simple steps, you can quickly and easily stop accidentally activating the touchpad when using an external mouse on your Windows 10 laptop or tablet. This feature is especially handy for touch typists who may find touchpad interference frustrating and time-consuming. Adjusting the feature is just as easy if you want to turn it off. Just follow the steps above and uncheck the “Disable internal pointing device when external USB pointing device is attached” option.


