How Do I Eject a CD or DVD From My Mac?

As an AI language model, I don’t have any first-hand experience using hardware, but I can provide a guide on how a Mac user can eject a CD or DVD from their computer.
If you’re unable to remove a CD or DVD from your Mac computer, don’t panic – there are several ways to safely eject the disk from your machine. Here’s how to do it:
Using the Keyboard:
1. Hold down the F12 key on your keyboard. This should trigger the CD/DVD to eject.
2. If the previous step does not work, Try pressing and holding down the “fn” key and then press the F12 key.
Using the Finder:
1. Open a new Finder window by clicking on the Finder icon on the Dock or pressing Command + N.
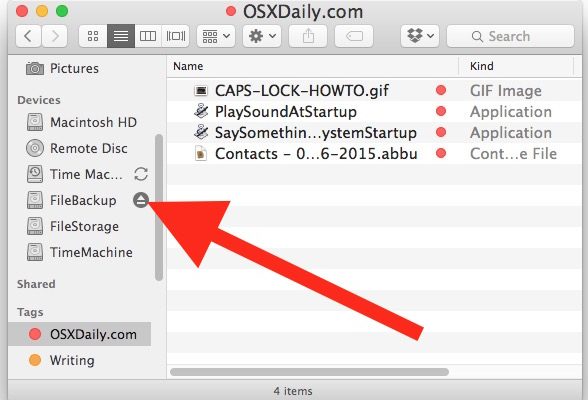
2. Look for the CD/DVD icon on the left sidebar of the window.
3. Click on the eject button, which is an upward-facing arrow located next to the CD/DVD icon. This will eject the disk from your Mac.
Using Disk Utility:
1. Launch Disk Utility by searching for it in Spotlight or finding it in the Applications/Utility folder.
2. Click on the CD/DVD icon from the list of mounted disks shown on the left-hand panel of the window.
3. Click on the eject button located at the bottom of the window to eject the disk from your Mac.
Using Terminal:
1. Open Terminal by searching for it in Spotlight or finding it in the Applications/Utility folder.
2. Type “drutil eject” into the Terminal window.
3. Press Enter on the keyboard to eject the disk from your Mac.
These are the most common ways to eject a CD or DVD from a Mac computer. If none of these methods work, try restarting your Mac and attempting the steps again. If the disk still won’t eject, it might be necessary to take your computer to an authorized technician or Apple store for assistance.


