How to Repair a Word Document: 11 Steps

Step 1: Make a Backup Copy
Before starting the repair process, be sure to make a backup copy of your Word document. This ensures that in case anything goes wrong during the repair process, you still have a copy to work with.
Step 2: Check for AutoRecover Files
Microsoft Word has an AutoRecover feature that saves your work periodically. Go to “File” > “Options” > “Save” and check the folder location for AutoRecover files. Locate and open the recovery file to see if it contains your lost data.
Step 3: Use Word’s Open and Repair Function
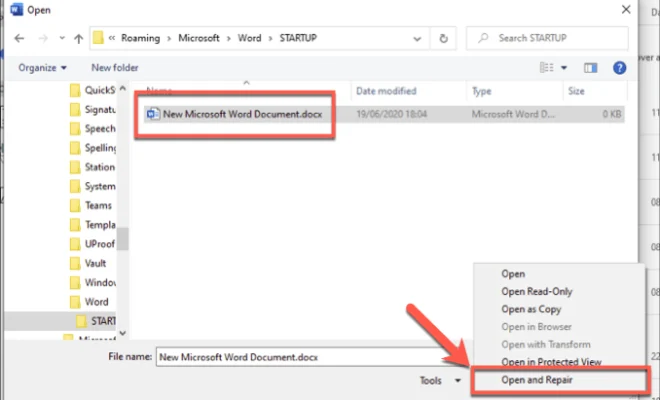
Open Microsoft Word and click on “File” > “Open.” Find and select your damaged document, click the drop-down arrow next to the “Open” button, and choose “Open and Repair.” Word will attempt to automatically repair the corrupted file.
Step 4: Change the File Extension
Try renaming the file extension from “.docx” to “.rtf” or “.txt” – this may allow you to recover at least some of your document’s content. Open the renamed file in Word, and then save it in its original format if successful.
Step 5: Use the Text Recovery Converter
If you have access to an older version of Microsoft Word, you can use the built-in Text Recovery converter. Go to “File” > “Open,” find and select your damaged document. In the “Files of type” box, choose “Recover Text from Any File.” This may recover text-only versions of your content.
Step 6: Try Third-Party Repair Tools
If none of these methods work, consider using third-party software designed specifically for repairing corrupt Word documents. Some popular options are Kernel for Word Repair, Stellar Phoenix Word Repair, and Remo Repair Word.
Step 7: Check for Conflicting Programs
Sometimes other software can interfere with Microsoft Word, causing it to crash or corrupt files. Ensure you don’t have any conflicting programs running, such as antivirus, system utilities, or other plugins.
Step 8: Scan for Malware
Viruses and malware could be responsible for the corruption in your document. Run a thorough virus scan of your computer to ensure no malicious programs are interfering with your documents.
Step 9: Update Microsoft Word
Make sure you’re using the latest version of Microsoft Word, as updates often include fixes for stability and performance issues. To check for updates, go to “File” > “Account” > “Update Options.”
Step 10: Use a Previous Version of the Document
If you have a previous version of your document saved elsewhere (cloud storage, email attachment, external hard drive), use it as a starting point for rebuilding the corrupted file.
Step 11: Seek Professional Help
If none of these methods work, consider reaching out to professional data recovery services for assistance in recovering your damaged Word document.
By following this 11-step guide, you’ll hopefully be able to restore your important Word documents while also implementing good practices for preventing future issues.


