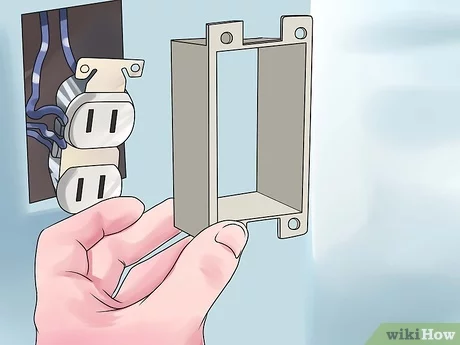
How to Tile Around Outlets: 15 Steps

Tiling around outlets might seem like a daunting task, but with the right tools and techniques, you can achieve a professional-looking finish. Here are 15 steps to help you tile around outlets effectively:
1. Plan your layout: Before starting the tiling process, plan your wall tiles’ layout to ensure a seamless look.
2. Mark the tiles: Mark which tiles will need to be cut to fit around outlet locations using a pencil and straight edge.
3. Gather tools and materials: You will need a tile saw or grinder, spacers, tile adhesive, grout, a notched trowel, level, safety goggles, gloves, and some clean, damp cloths for wipe-down.
4. Turn off electricity: Before starting any work near electrical outlets, turn off the power at the circuit breaker to avoid any accidents.
5. Remove outlet covers and hardware: Unscrew outlet covers and remove any switch plates or other hardware in the area to avoid damage during the tiling process.
6. Cut tiles: Using a tile saw or grinder, carefully cut marked tiles to fit around the outlets. Ensure that you wear safety goggles and gloves during this process.
7. Apply adhesive: Generously apply tile adhesive to the back of each cut tile using a notched trowel.
8. Place cut tiles: Position cut tiles around outlets using spacers between them to ensure even spacing. Make sure they are level and aligned with the rest of your installation.
9. Install full-size tiles: Once outlet areas have been tiled, continue installing full-size tiles around them in your chosen pattern using tile adhesive and spacers.
10. Check alignment: Frequently use a level during tiling installation to ensure that all tiles remain flush with each other as you build your pattern.
11. Allow adhesive to dry: Leave all installed tiles undisturbed for at least 24 hours to allow the adhesive to set properly.
12. Remove spacers: Once the adhesive is dry, carefully remove all tile spacers.
13. Apply grout: Fill the spaces between the tiles with grout using a rubber float, making sure to fill each joint completely and avoid getting excess grout on electrical outlets or switches.
14. Wipe away excess grout: Use a clean, damp cloth or sponge to wipe away any excess grout on tile surfaces and around outlets, rinsing it frequently in clean water.
15. Reinstall outlet covers and hardware: After the grout has dried, reinstall all outlet covers, switch plates, and other hardware to complete the tiling job.
By following these 15 steps, you can skillfully tile around outlets for a polished and professional-looking finish. Ensure that safety remains a priority when working with tools and electricity, and enjoy your beautiful new tiled space!

