How to Repair Grout: 9 Steps

Grout is an essential component of tiled surfaces, as it holds tiles in place and fills the gaps between them to prevent water and dirt from seeping in. However, over time, grout can crack, discolor, or become damaged due to various reasons. In this article, we will guide you through nine simple steps to repair your grout and restore the beauty of your tiled surfaces.
1. Gather the necessary tools and materials:
To repair grout, you will need a grout saw or utility knife, grout remover, vacuum or brush, sponge, gloves, safety goggles, pre-mixed grout or grout powder with water, and a rubber grout float or applicator.
2. Identify the areas that need repair:
Inspect your tiled surface carefully and identify the areas with damaged or cracked grout. Pay attention to the corners and edges where damage is more likely.
3. Remove the damaged grout:
Put on safety goggles and gloves before starting this process. Use a grout saw or a utility knife to gently scrape away the damaged grout from the joints. Be cautious not to damage the tiles during this process.
4. Clean the joints:
Once you have removed all damaged grout, use a vacuum cleaner or brush to remove any debris from the joints thoroughly. This step is crucial to ensure proper adhesion of the new grout.
5. Mix the new grout (if needed):
If you bought pre-mixed grout, you can skip this step. If you have powdered grout, follow the manufacturer’s instructions on mixing with water until it reaches a smooth consistency.
6. Apply the new grout:
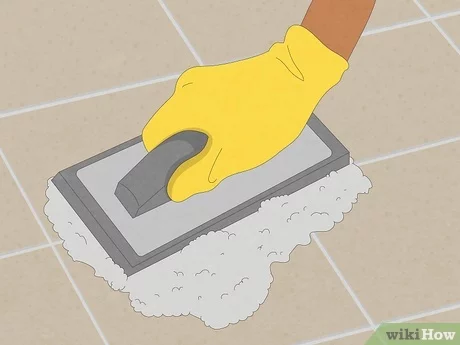
Wearing gloves for protection against skin irritation caused by cement-based products, use a rubber float or applicator to apply your new grout into the cleaned joints. Compress as much as possible into each joint for proper adhesion.
7. Remove excess grout:
As you apply the new grout, you’ll likely see excess forming on the tiles’ surface. With your rubber float or applicator, carefully remove the excess grout by holding it at a 45-degree angle and sweeping diagonally across the tiles.
8. Finishing and cleaning:
Wait for the new grout to set, according to manufacturer recommendations (typically 15-30 minutes). Then, dampen a sponge and gently wipe away any grout haze from the surface of your tiles. Rinse your sponge often in clean water during this process to avoid spreading more residue onto other areas.
9. Allow the grout to cure:
Before using your newly repaired tiled surface (e.g., taking a shower or walking on a newly-grouted floor), follow the manufacturer’s curing time guidelines (usually 24-48 hours) to ensure proper adhesion and strength.
By following these nine steps, you can easily repair grout, restoring your tiled surfaces to their original beauty and ensuring they remain functional for years to come. Regular maintenance and proper cleaning will also help extend the life of your grout and keep your surfaces looking great.


