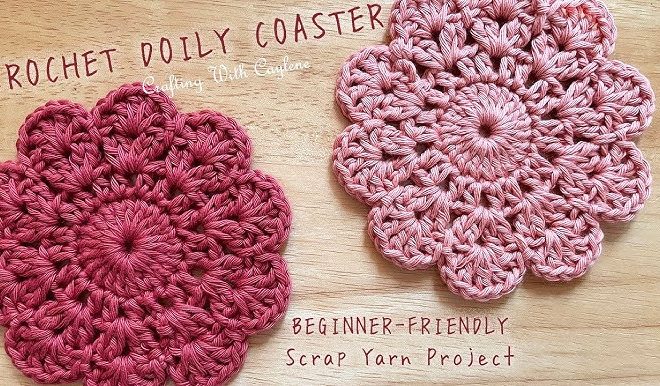
How to Crochet Coasters: 13 Steps

Introduction:
Crocheting coasters is a fun and creative way to add a unique touch to your home decor while also protecting your furniture from beverage stains. In this guide, we’ll outline 13 steps that anyone can follow to create eye-catching and functional crochet coasters.
Step 1: Gather Necessary Materials
To get started, you’ll need the following:
– Yarn (cotton works best for coasters)
– Crochet hook (appropriate size for your yarn)
– Scissors
– Yarn needle
Step 2: Choose a Pattern
Find a crochet coaster pattern that suits your style and skill level. There are countless designs available online ranging from simple circles to intricate motifs.
Step 3: Create a Slip Knot
Make a loop with your yarn by crossing the end over the working yarn. Insert the crochet hook into the loop and grab the working yarn, pulling it through. Pull both ends of the yarn to tighten the knot around the hook.
Step 4: Chain Stitches
Create a foundation chain by making a series of chain stitches following your pattern’s instructions. The length of the chain will depend on your chosen pattern.
Step 5: Join Chain
Join the chain to form a ring or foundation row by slip stitching into either the first or last stitch, as indicated by your pattern.
Step 6: Start Crocheting
Begin following your pattern’s instructions for single crochet, half-double crochet, double crochet, or other stitches as needed. Pay close attention to increases or decreases and repeat patterns when necessary.
Step 7: Complete First Round/Row
Finish crocheting the first round or row according to your pattern’s instructions. At this point, you should have an initial base for your coaster.
Step 8: Continue Additional Rounds/Rows
Follow your pattern’s directions to crochet additional rounds or rows, building upon the initial base until your coaster reaches the desired size and shape. Remember to maintain a consistent tension in your stitches.
Step 9: Bind Off
Once the coaster is complete, cut the yarn, leaving a tail of approximately 6 inches. Then, pull the yarn through the last loop on your crochet hook and tighten to create a secure knot.
Step 10: Weave in Ends
Using a yarn needle, thread the tail of yarn you just cut and weave it through several stitches on the underside of your coaster. This helps to hide and secure any loose ends. Repeat with any other tails from color changes.
Step 11: Block Your Coaster (Optional)
To give your coasters a polished finish and uniform shape, you can block them. To do this, lightly dampen the coasters with water or steam, then pin them to a blocking board or foam mat, ensuring they lie flat and maintain their shape. Allow them to dry completely before removing pins.
Step 12: Repeat for Additional Coasters
For a complete set of matching coasters, repeat steps 1-11 for each additional piece needed.
Step 13: Enjoy Your Handmade Coasters!
Now that you’ve completed all steps, it’s time to marvel at your handy work and enjoy using your unique handmade crochet coasters!
Conclusion:
With these simple steps in place, anyone can learn how to crochet beautiful coasters that add a touch of charm to their home decor. Practice different patterns and experiment with various colors until you find the perfect combination for your individual style. Plus, these crocheted coasters make thoughtful, heartfelt gifts for friends and family!

