How to Restore an Old Steering Wheel
If you own a classic car or simply enjoy restoring older vehicles, you’ll likely come across an old steering wheel that’s seen better days. Whether it’s worn down, cracked, or damaged in any other way, fear not! This guide will walk you through the process of restoring an old steering wheel to make it look and feel like new.
Step 1: Assess the Damage
Before starting the restoration process, take some time to closely examine the steering wheel and assess the extent of the damage. Look for peeling paint, cracks, fading colors, and any loose components. Make a note of everything you need to repair or replace.
Step 2: Gather Your Tools and Supplies
To get started, ensure you have all the necessary tools and materials:
– Screwdriver
– Sandpaper (various grits)
– Plastic filler or epoxy
– Primer
– Paint (color-matched to your steering wheel)
– Clear coat
– Masking tape
_ Gloves
– Clean rags
– Bucket with soapy water
Step 3: Disassemble the Steering Wheel
Before working on any repairs, first disconnect your vehicle’s battery for safety reasons. Then remove the horn pad or button, followed by the steering wheel itself. This might require using a steering wheel puller to break it free from the column.
Step 4: Clean and Sand
Wash the steering wheel thoroughly with soapy water and a clean cloth to remove dirt and grime. Then let it dry before beginning to sand down any rough spots or old paint layers. Start with a coarse-grit sandpaper (80 grit) and work your way up to finer grits (150-220 grit). Be sure to sand evenly across the surface.
Step 5: Fill Cracks and Holes
Inspect your steering wheel for cracks and holes. If you find any, fill them with the appropriate plastic filler or epoxy. Follow the manufacturer’s instructions for preparing and applying the filler, and allow sufficient time to dry before sanding down the filled areas.
Step 6: Apply Primer
After sanding it thoroughly, apply a coat of primer to your steering wheel. This helps the paint adhere better and last longer. Follow the manufacturer’s instructions for application, and allow it to dry completely before moving on.
Step 7: Paint Your Steering Wheel
When your primer has dried, mask off any areas that you don’t want to be painted. After that, apply several thin coats of color-matched paint, allowing each coat to dry before applying the next one. Always use a well-ventilated space when painting.
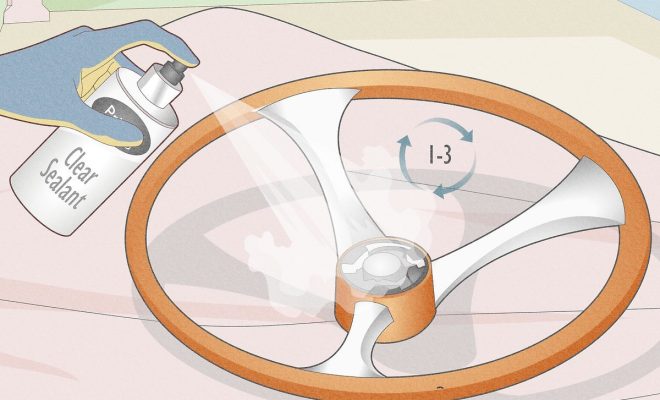
Step 8: Apply Clear Coat
Once your paint is fully dried, apply a clear coat finish to protect the paint and give your steering wheel a beautiful shine. Follow the manufacturer’s instructions for application, and allow adequate drying time before reassembling your steering wheel.
Step 9: Reassemble Your Steering Wheel
Now that your steering wheel has been restored, carefully reattach it to your car’s steering column along with any other hardware you removed earlier. Reconnect your vehicle’s battery, and admire your refurbished steering wheel!
In conclusion, restoring an old steering wheel is a rewarding project that can breathe new life into a classic car or aging vehicle. Follow these steps carefully, and you’ll soon have a beautiful, functional steering wheel worthy of showing off!