Easy Ways to Dye Candy Melts: 11 Steps
Introduction:
Dyeing candy melts is a fun and easy way to add color to your baking and dessert-making projects. Candy melts, also known as melting wafers, are versatile edible decorations that can be used for many purposes. In this article, we’ll walk you through 11 simple steps to dye your candy melts and create colorful masterpieces.
Step 1: Gather Your Materials
You’ll need the following items:
– Candy melts (in the base color of your choosing)
– Food coloring (either oil-based or gel-based)
– A microwave-safe bowl
– A silicone spatula
– Wax paper or a silicone baking mat
Step 2: Choose Your Food Coloring
For best results, use oil-based or gel-based food coloring. Avoid water-based food colors as they can cause the candy melts to seize up and become difficult to work with.
Step 3: Melt the Candy Melts
Place the desired amount of candy melts in a microwave-safe bowl. Microwave in 30-second intervals at 50% power, stirring after each interval until completely melted and smooth.
Step 4: Add Food Coloring
Add a few drops of food coloring to the melted candy melts. Start with a small amount and gradually add more until you achieve your desired color intensity.
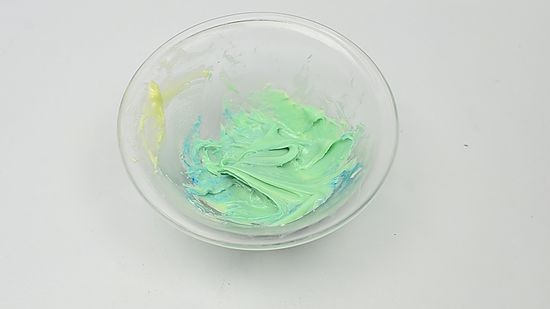
Step 5: Mix Thoroughly
Using a silicone spatula, mix the food coloring into the melted candy melts until fully combined and evenly colored. Be careful not to overmix as this can cause the candy melts to harden.
Step 6: Test the Color
Dip a piece of wax paper or a silicone baking mat into the colored candy melt mixture to check if the color is what you’re aiming for. You can always add more food coloring if necessary.
Step 7: Adjust Color if Needed
Add more food coloring if needed and mix until the desired color is achieved. Remember to add food coloring sparingly, as a little goes a long way.
Step 8: Cool the Candy Melts
Allow the dyed candy melts to cool slightly, making sure they’re not too hot to touch.
Step 9: Work with the Candy Melts
Now that your candy melts are colored, you can use them to dip or drizzle onto your baked goods, mold them into shapes or designs, or pipe them using a piping bag and tip.
Step 10: Store Your Colored Candy Melts
If you have leftover dyed candy melts, store them in an airtight container at room temperature for up to two weeks.
Step 11: Enjoy!
Use your beautifully colored candy melts to enhance your desserts and impress your friends and family!
In conclusion, dyeing candy melts is a simple yet effective way to add vibrant colors to your edible creations. With a few basic steps, you’ll be able to customize your sweets and treats with ease. Happy decorating!