How to Test Resistors: 9 Steps
Step 1: Understand the role of resistors
Resistors are passive electronic components that limit or regulate the flow of electric current through a circuit. They are used in a wide range of applications, from simple circuits to complex electronic devices. Knowing why and how they work will help you diagnose any issues.
Step 2: Gather the necessary tools
To test a resistor, you will need a multimeter (either digital or analog) that has a resistance measurement function (measured in ohms), safety goggles, gloves, and the resistor(s) to be tested.
Step 3: Turn off the power supply
Before testing any electronic components, always turn off and unplug the power supply. This helps prevent damage to your devices and ensures your safety.
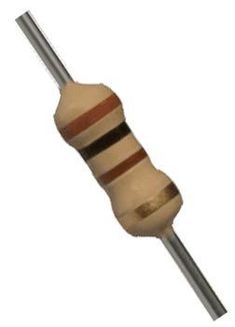
Step 4: Locate the resistor
In your circuit or device, identify the resistor(s) to be tested. They are typically color-coded or marked with their resistance values.
Step 5: Set up the multimeter
Set your multimeter to measure resistance (ohms – symbolized by Ω). If your multimeter has multiple resistance settings, choose the appropriate one based on the expected resistance value.
Step 6: Remove the resistor from the circuit
To test a resistor accurately, it is best to remove it from its circuit. Removing the resistor minimizes any interference caused by surrounding components. Use appropriate tools to ensure safe removal.
Step 7: Connect multimeter probes
Place one probe on each end of the resistor. It doesn’t matter which probe goes on which end since resistors are not polarized components. Ensure good contact between probes and resistor leads for accurate measurement.
Step 8: Read multimeter display
Check the reading on your multimeter’s display. The displayed value should be close to the expected resistance value (based on color-coding or marking). It is normal to have slight variations, but if there’s a significant difference, the resistor might be damaged or faulty.
Step 9: Reinstall and reevaluate
Once you have tested the resistor(s), reinstall them into their respective circuits. If any issues persist, consider seeking professional assistance or replacing the faulty resistor(s).
By following these nine steps, you can effectively test resistors and diagnose any potential issues in your electronic devices or circuits. Regular testing not only ensures optimal performance but also prolongs the life of your equipment.