3 Ways to Mold Clay
Introduction
Clay molding is an ancient and widespread art form that’s easy to learn and offers endless creative possibilities. Whether you’re a beginner or a seasoned artist, mastering various clay molding techniques can help you unleash your creativity and bring your ideas to life. In this article, we will discuss three fundamental methods for molding clay – pinching, coiling, and slab construction.
1. Pinching Technique
The pinching technique is the simplest method of shaping clay and is perfect for beginners. As the name suggests, it involves pinching the clay between your fingers to create the desired shape. This technique is ideal for creating small objects, like bowls, cups, or figurines.
Step-by-step guide:
a) Start by taking a small ball of clay and softening it by kneading with your hands.
b) Holding the clay ball between your thumb and fingers, begin pinching and forming the walls of the object.
c) As you pinch the walls outward, keep turning the object in your hand to ensure even thickness.
d) Once you have achieved your desired shape, smooth out any rough edges with a damp sponge or cloth.
2. Coiling Technique
Coiling is another simple and versatile technique used to create more complex shapes like pots and vases. It involves building up layers of rolled clay coils that are then blended together seamlessly.
Step-by-step guide:
a) Knead a larger piece of clay until it becomes soft and pliable.
b) Roll it out into a long coil-like snake using your hands or on a flat surface.
c) Start by shaping the base of your object – this can be a flat or rounded shape depending on the design.
d) Begin adding layers by coiling the rolled clay around the base while ensuring each coil stays level.
e) Smooth out the layers using your fingers or tools as you go along, blending each new coil with the previous one.
f) Continue building up the coils until your desired height is reached, and finalize the shape.
3. Slab Construction Technique
Slab construction is a popular method for creating larger and more intricate objects like plates, boxes, or sculptures. This technique involves creating flat slabs of clay and then assembling them to form the desired structure.
Step-by-step guide:
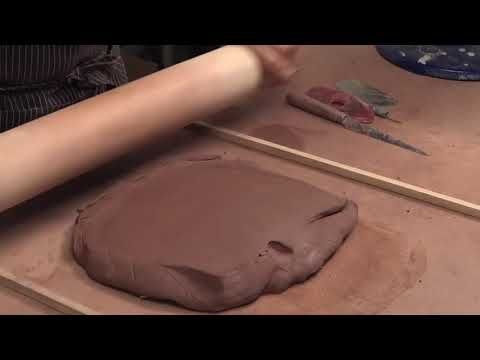
a) Begin by rolling out a large piece of well-kneaded clay on a flat surface to create an even slab.
b) Use a rolling pin or similar tool to flatten out the clay to your desired thickness – usually around 1/4 to 1/2 inch.
c) Cut out various shapes and sizes that will make up your design using a sharp knife or other cutting tools.
d) Assemble the cut pieces together, smoothing the edges and seams with water and a small spatula or similar tool to ensure a tight bond.
e) Add details or textures as desired, being careful not to disturb the main structure.
Conclusion
Now that you’re familiar with these three essential clay molding techniques – pinching, coiling, and slab construction – you can combine them and experiment with different forms and textures. Remember that practice is key in mastering any art form, so don’t be discouraged if your first few attempts don’t turn out perfect. Keep molding and exploring your creativity!