How to Replace Shower Knobs
Replacing shower knobs is an essential skill for every homeowner. Whether you’re remodeling your bathroom or simply fixing a leaky faucet, this guide will walk you through the process of replacing your shower knobs from start to finish.
Step 1: Gather Your Tools
Before starting, gather the necessary tools and supplies. You’ll need:
– Adjustable wrench
– Screwdriver set
– Plumber’s tape
– Replacement knobs (compatible with your shower valve)
– Bathroom cleaner and cloth
Step 2: Turn Off the Water Supply
Locate and turn off the water supply to your shower. This is usually found in a basement or utility room. Shutting off the water ensures that you won’t accidentally cause a flood when removing the old knobs.
Step 3: Remove the Old Knobs
Start by removing the decorative cap at the center of each knob. Use a flathead screwdriver to gently pry it off, revealing the screw beneath. With a Phillips screwdriver, remove the screw while holding the knob in place.
Once the screw is removed, you can pull the knob free of its stem. If you encounter resistance, use an adjustable wrench to loosen any remaining components.
Step 4: Clean and Prep
Now that your old knobs are removed, use a bathroom cleaner and cloth to clean any grime or deposits around the valve stem. This will ensure a tight fit between your new knobs and their components.
Apply plumber’s tape around the threaded portion of each valve stem to improve sealing and prevent leaks.
Step 5: Attach New Knobs
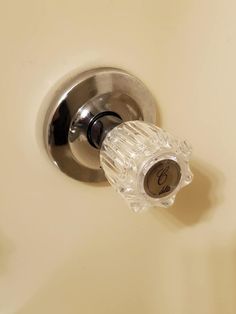
Slide your new shower knob onto its respective valve stem and align it properly. Keep in mind that hot and cold knobs might be of different sizes or include letters indicating their correct placement.
Hold each knob in position while attaching its screw back into place using a Phillips screwdriver. Avoid over-tightening, as this may damage the components or prevent the knob from turning smoothly.
Once the screws are secure, snap the decorative caps back onto the knobs to conceal their attachment points.
Step 6: Test Your Work
Turn your water supply back on and test your new shower knobs. Run both hot and cold water to check for any leaks around the base of the knobs. If necessary, tighten any components with your adjustable wrench. When satisfied with your installation, enjoy your sleek new shower knobs.
In conclusion, replacing shower knobs is a straightforward process that can be completed with just a few tools and a bit of patience. By following this step-by-step guide, you’ll save money on a plumber and give your bathroom a fresh, updated look.