How to Perm Your Hair
Introduction:
Having gorgeous, bouncy curls can turn heads and give you a boost of confidence. Perming your hair is one way to achieve this look without having to rely on daily styling methods. Perming has come a long way since the tight curls of the 1980s – now, you can go for loose waves or tighter spirals depending on your preference. In this article, we will guide you through the process of perming your hair step by step.
1. Choose the right perm for your hair:
There are several types of perms available in the market, such as cold perms, hot perms, and digital perms. It is essential to research and consult with your hairstylist to decide which perm is most suitable for your hair type and desired look.
2. Prepare your hair for perming:
In the weeks leading up to your perm, use a deep conditioner or hair mask to strengthen and nourish your locks. Avoid coloring or bleaching your hair before perming, as multiple chemical processes may damage your tresses. Ideally, have a trim if required, removing split ends before getting a perm.
3. Gather necessary tools and products:
You will need items such as rubber gloves, a mixing bowl, a tint brush, a wide-toothed comb, end wraps, and perm rods of various sizes depending on the desired curl size. Purchase a reputable at-home perm kit or invest in quality salon products with neutralizers and perm solutions.
4. Sectioning your hair:
Before you get started with applying the chemicals, comb through your clean and towel-dried hair while parting it into four equal sections – one on each side of the head and one in front and back.
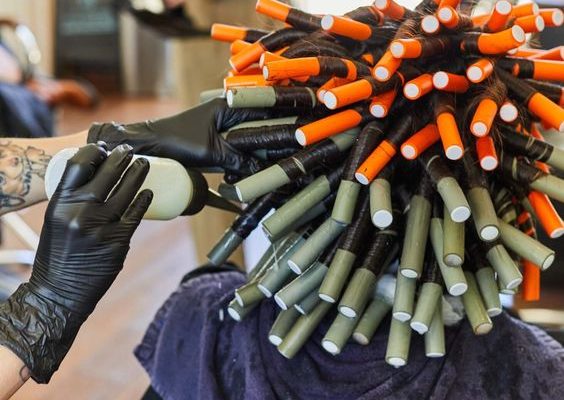
5. Applying the perm solution:
Wear rubber gloves to protect your hands from chemicals during this process. Begin at the back of your head by taking small subsections of hair, placing end wraps at the tip, and winding the hair around a perm rod. Once all your hair is rolled, carefully apply the perm solution to each individual rod using a tint brush. Make sure you cover every strand of hair thoroughly for uniform results.
6. Timing and rinsing:
Follow the instructions indicated on your chosen perm solution regarding the development time. Typically, it ranges from 15 to 30 minutes. After the recommended amount of time has passed, rinse your hair thoroughly with warm water for about five minutes while keeping the rods in place.
7. Applying neutralizer:
Following a thorough rinse, apply a neutralizing solution using a tint brush on each perm rod. Allow the neutralizer to sit for the recommended time as specified in your product instructions.
8. Removing the rods and styling:
Gently remove each perm rod from your hair and use a wide-toothed comb to detangle your new curls gently. Refrain from brushing or using heat-styling tools immediately after perming to avoid damage. To create defined curls, allow your hair to air-dry or use a diffuser attachment on your hairdryer at low heat settings.
9. Post-perm care and maintenance:
Take care of your newly permed hair by regularly deep conditioning and using sulfate-free shampoos and conditioners designed for chemically treated hair. Avoid any chemical treatments such as coloring or bleaching for at least one month after your perm.
Conclusion:
Perming can be an excellent option to achieve bouncy curls without the need for daily styling. Following these steps and taking care of your permed hair will ensure healthy and beautiful tresses that last for months to come.