
How to Make a Quilt
Quilting is a timeless art form that not only results in a beautiful and cozy piece of functional art but also provides a sense of accomplishment and pride. Whether you’re new to sewing or an experienced stitcher looking for a new challenge, this article will guide you through the process of making a quilt from start to finish.
Step 1: Choose Your Design
Before starting your quilt, you’ll need to decide on a design. There are countless quilt patterns available – from traditional blocks and stars to modern geometric designs. You can find patterns in books, online, or even create your own unique design. As a beginner, it’s best to start with a simple pattern that doesn’t require advanced sewing or piecing skills.
Step 2: Gather Your Supplies
To make a quilt, you’ll need the following supplies:
– Quilt fabric: Choose high-quality 100% cotton fabric for your quilt top and backing. To determine the amount of fabric needed, refer to your pattern instructions.
– Batting: This is the layer of insulation between the quilt top and backing. Choose one according to your desired thickness.
– Thread: Choose a good-quality thread in coordinating colors for both piecing and quilting your quilt.
– Cutting tools: A rotary cutter, mat, and clear acrylic ruler will make cutting your fabric pieces easier and more accurate.
– Sewing machine: A basic sewing machine with a straight stitch setting is sufficient for making quilts.
– Pins and other notions: Invest in quality straight pins, safety pins, and other necessary notions like seam rippers and fabric markers.
Step 3: Cut Your Fabric Pieces
Once you’ve gathered all your supplies, start by cutting your fabric according to your pattern instructions. Using a rotary cutter, mat, and acrylic ruler will help ensure precise cuts.
Step 4: Piece Together Your Quilt Top
Following your pattern, begin sewing your fabric pieces together to create your quilt top. Remember to use a 1/4-inch seam allowance and keep your seams straight. Press all seams to one side, as this makes it easier to align your pieces while reducing bulk.
Step 5: Assemble Your Quilt Sandwich
Next, lay your backing fabric on a flat surface, right side down. Spread the batting evenly on top of the backing fabric, followed by the quilt top, right side up. Use safety pins to secure the layers together every six inches or so, working from the center outward.
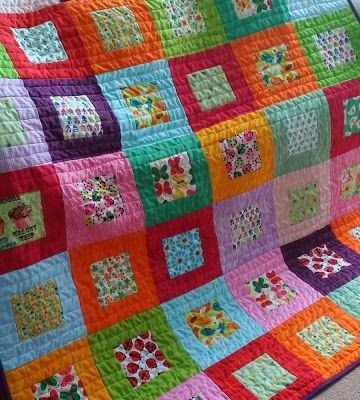
Step 6: Quilt Your Layers Together
Now it’s time to quilt your layers together. You can choose from various quilting methods such as hand quilting, machine quilting, or tying. For beginners, straight-line or “stitch in the ditch” machine quilting is an excellent choice, as it simply requires sewing along the existing seam lines.
Step 7: Bind and Finish Your Quilt
Finally, you’ll need to bind your quilt to cover the raw edges and give it a finished look. Cut fabric strips approximately 2.5 inches wide and sew them together end-to-end to create a long binding strip. Attach it to the front of the quilt using a 1/4-inch seam allowance, then fold it over and hand-stitch it to the backing fabric.
Congratulations! You’ve successfully made a quilt! With practice, you can experiment with different fabrics, techniques, and designs to grow your quilting skills.


