3 Ways to Install a Bathroom Fan
Introduction
Installing a bathroom fan may seem daunting, but it is actually an achievable task for homeowners. Having proper ventilation in your bathroom is essential for preventing mold and mildew, as well as eliminating bad odors and controlling humidity. Bathroom fans come in various sizes and styles to suit your needs. In this article, we will discuss three methods of installing a bathroom fan that you can choose from.
1. Ceiling Installation
The most common type of bathroom fan is the ceiling-mounted model which vents air directly outside or through ductwork.
Step 1: Choose the right fan for your bathroom according to the size, electrical connections, and ductwork requirements.
Step 2: Find the best location for your fan and ensure there are no obstacles, such as pipes or wires.
Step 3: Use a template or measuring tape to mark the opening on the ceiling and cut it with a drywall saw or jigsaw.
Step 4: If necessary, mount brackets to secure the fan housing or attach it directly to ceiling joists.
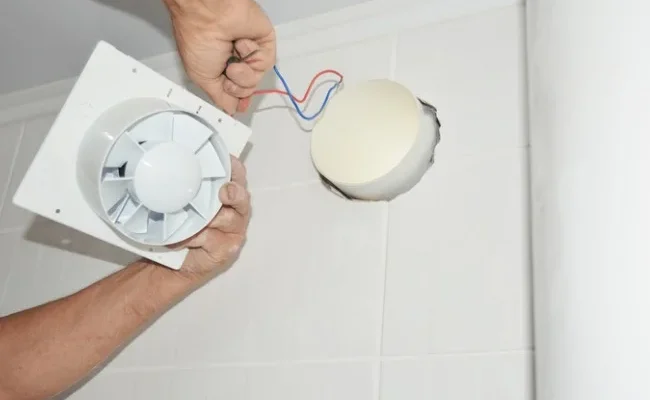
Step 5: Connect the electrical wiring according to the manufacturer’s instructions.
Step 6: Attach the ductwork to the fan housing and route it towards the external vent.
Step 7: Securely fasten the housing in place and install the grille over it.
2. Wall Installation
If your bathroom lacks space in the attic or has a flat roof, wall-mounted bathroom fans are an excellent alternative venting solution.
Step 1: Choose a wall-mounted fan suitable for your wall material – whether drywall, masonry or wood panels.
Step 2: Locate an appropriate spot for installation while avoiding electrical wires, pipes or support beams.
Step 3: Trace around a provided template or measure out the desired opening size on both interior and exterior walls.
Step 4: Cut an opening in both walls using appropriate tools – such as drywall saw or masonry bit.
Step 5: Install the fan housing in the opening, securing it with wall anchors or wood screws as required.
Step 6: Wire the fan according to the manufacturer’s instructions and install a weatherproof cover on the exterior side of the wall.
Step 7: Cover the interior side of the fan housing with a grille for a finished appearance.
3. Window Installation
Window bathroom fans are a simple but effective solution for areas where other installations may not be possible.
Step 1: Select a window model sized to fit your existing bathroom window panes.
Step 2: Remove the targeted window pane safely following proper guidance.
Step 3: Attach the window fan brackets or specially designed mounting kit to either side of the window frame.
Step 4: Install your window fan carefully, ensuring a tight fit between brackets and housing for stability.
Step 5: Connect electrical wiring following safety guidelines and manufacturer’s instructions.
Step 6: Secure the fan in place using lock clips or screws, and reinstall any removed window panels.
Conclusion
Installing a bathroom fan is an important step towards maintaining adequate airflow and comfort in your bathroom. With three different installation methods – ceiling, wall, or window – you can choose what works best for your home and needs. Always follow safety guidelines and consult professional help when necessary for reliable results.